Wire-inlaid box
This was created as an award for someone. The text is created with wire on three sides. The top of the box has the award image.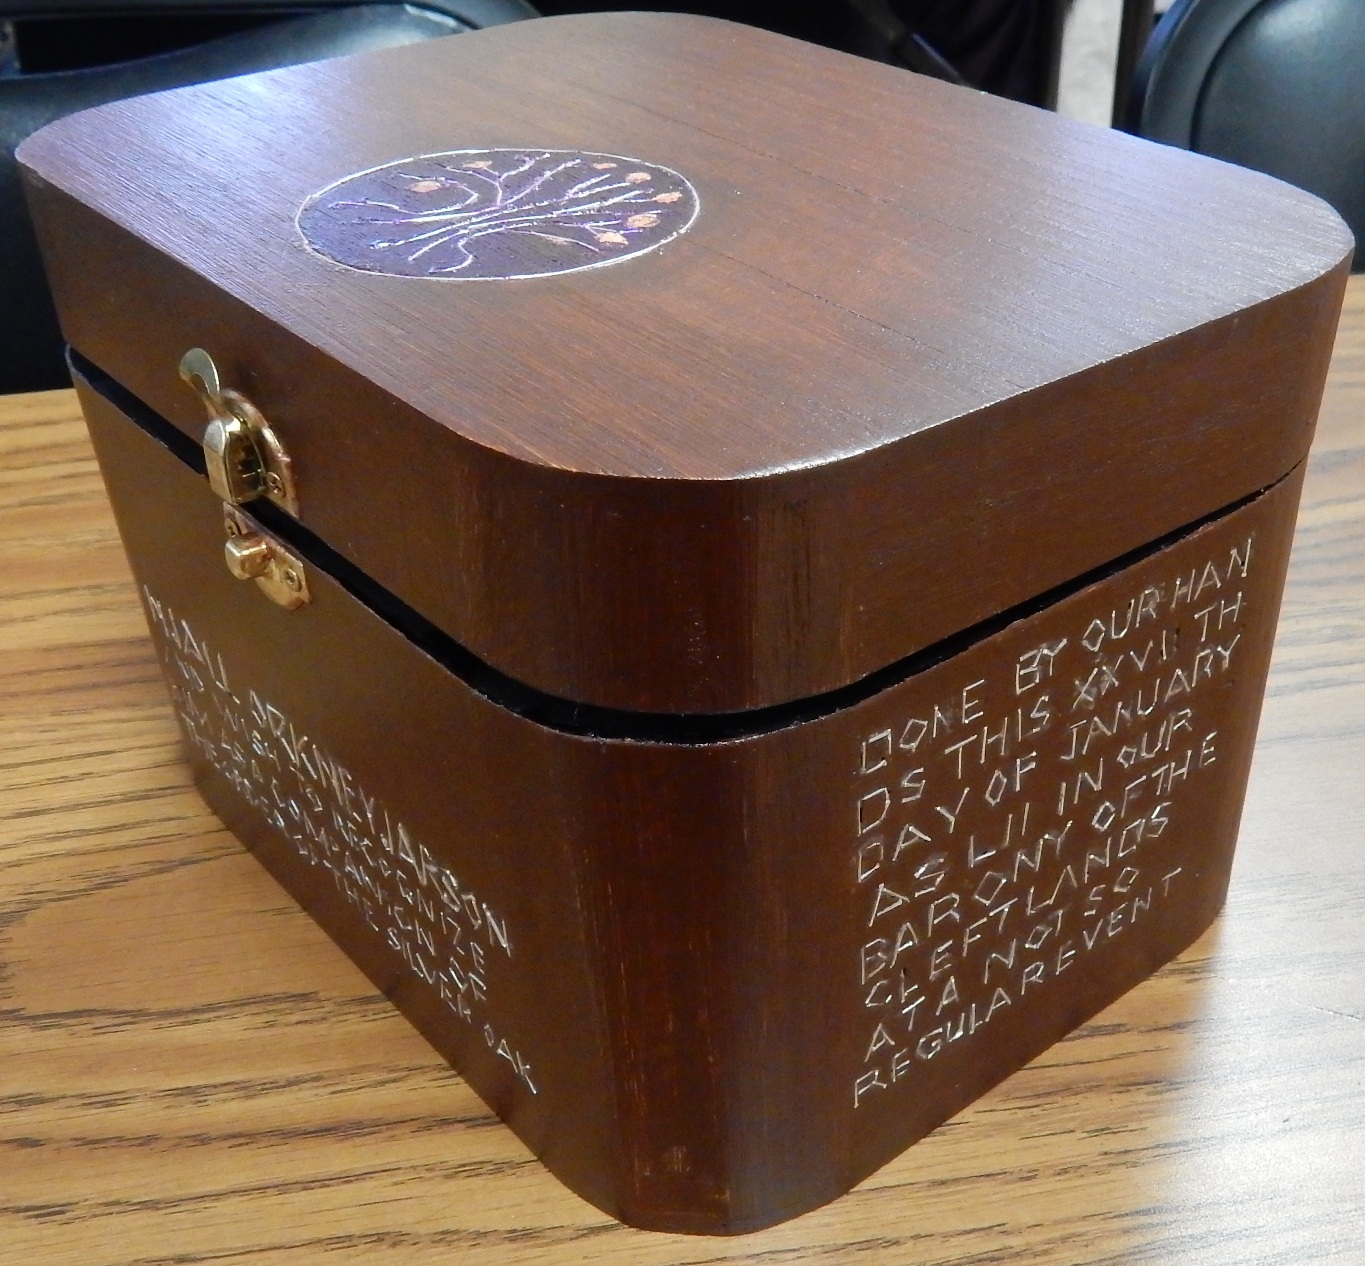
Materials
- Balsa or linden box
- You want a soft wood. You can go for a harder wood but then you will likely need a dremel tool for creating the channels for the wire.
- Thin Wire
- The choice is yours for metal and gauge (wire thickness). The heavier the gauge, the wider the channels and the stiffer the metal will be. Color is also your choice.
- Exacto knife/box cutter
- Used for cutting channels into the wood. You may have other tools available that will also work.
- Pencil
- Ruler
- To draw the lines for where the text appears.
- White Glue
- This holds the wires in place until it is finished. The problem with using more durable glue is that it dries so fast that you will likely be re-doing many letters because the wire shifted as you were trying to position it - and you will have more glue on your hands than on the wire.
- Stain
- Stain helps make the metal letter stand out against the wood. Your choice of color. Consider how the metal will stand out against the stain. You may want to thin it out so you don't have to rub it hard into the wood.
- Polyurethane/Varnish
- This both finishes the box and seals the metal into the wood.
Construction Instructions
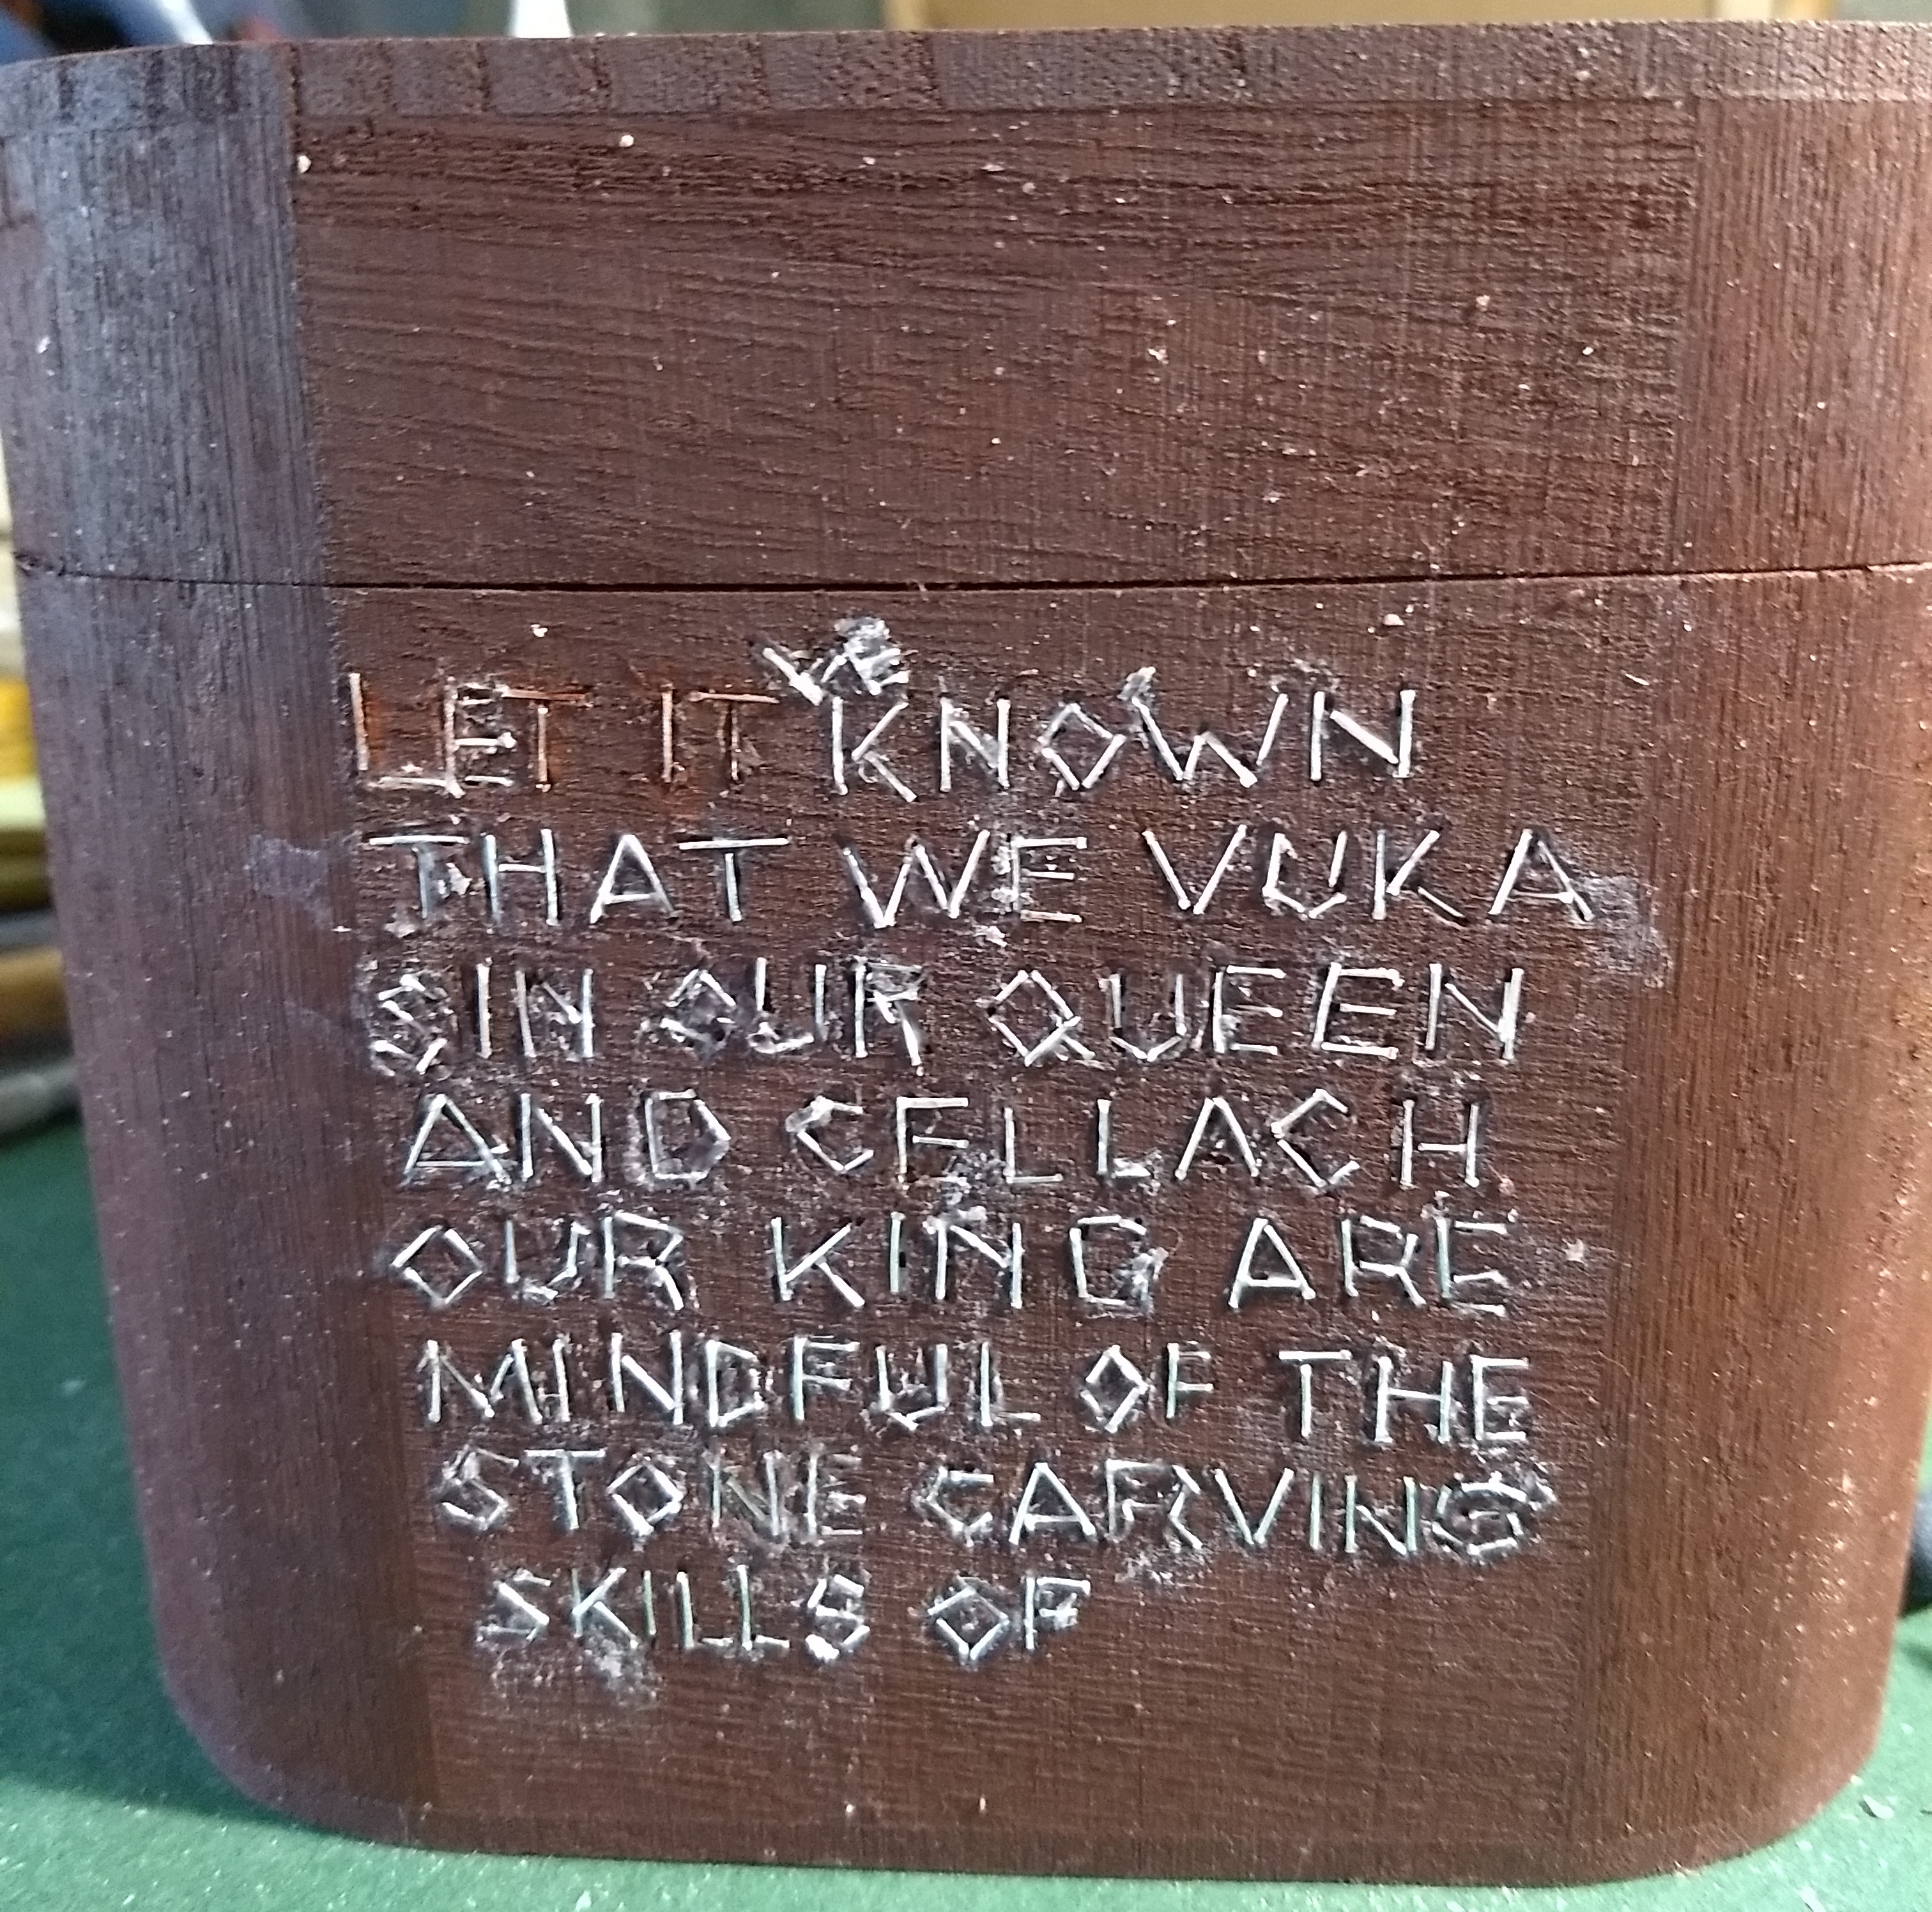
TODAY IS A WONDERFUL DAY
Very often, using ALL CAPS works best.
Draw lines on paper as sample for the text to put on the box. Include the spacing for the lines. Put these lines in pen.
Write out the text on those lines. You want to have space between letters and the space between words.
Draw the lines and letters on the box making sure you like the fitting. Don't worry about erasing the lines as they wear off as you work on the box.
Draw the letters that you will inscribe. You can draw them heavier than you think you need since you will be carving grooves where these lines exist. You will need to glance at these letters periodically. As you work on creating the grooves for the wire, you may wipe off some letters so don't be surprised that you have to redraw some letters from time to time.
Now use your exacto knife and other carving tools. You want the grooves for the letters to be deeper than the wires.
Cut the wire into small little bits about 1/8" to 1/2" in length. These are what you inlay into the grooves.
Put some wood glue into the grooves then push the pieces of the wire into them. You want to push the wires so they are at or below the top layer of the wood. The wood glue will not hold the wires firmly but will last long enough until you polyurethane the box and it is the polyurethane that will hold the wires in place. It is acceptable that some of the glue be on the top layer of the box. The glue will become clear with drying.
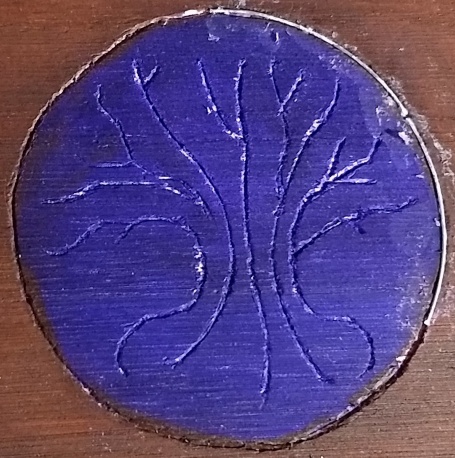
Adding Award Image
Most of what is done for the award image but there were some gottchas.
I didn't do one wire for the entire circle. It was just too annoying to get the shape right. However, the wire groove cutout on the edge has a special function. When the circle interior was colored in, that groove prevented the color from bleeding. Thus, if I was doing a more complex color design, I would make a point of putting wire to separate the colors.
The color - its from a sharpie marker. Other materials will certainly work. Even waterbased colors work as the box is later finished with polyurethane.
The gold is actual gold leaf. Gold leaf is a joy to work with and I used so little here.